Using digicam as a webcam on Linux
Buying a proper webcamera can turn out pretty costly, so why not fetch your old camera from a cellar and plug it into your laptop? How hard can it be?
I recently dug out a pretty old Canon EOS 550D, and since I only have a poor built-in webcam, that was a chance to improve my video quality significantly!
Once plugged into a USB port, the camera is detected just as storage. We need two things to make it work properly:
- Stream the video feed from it
- Pipe this feed into a virtual video input device
🔗Grabbing the video feed
The first step is pretty simple — just use gphoto2:
)
<enjoy 🔗Creating a fake video device
The second piece of the puzzle is v4l, in particular, v4l2loopback. If you’re using Arch like me, you can just install it:
This will also install the required DKMS package to bring in the kernel module named v4l2loopback.
Now run
To create a virtual video device. You can check the kernel logs for the exact path; in my case, it was /dev/video2
Now we can stream the video feed from the camera to that device using ffmpeg!
| \
NB: If this command fails with a permission error, make sure that your user is in
videogroup:sudo usermod -aG video $USER
Now we need to enable this module on boot:
v4l2loopback
And finally let’s set default module options:
v4l2loopback exclusive_caps=1 card_label="GPhoto2 Webcam"
NB: After reboot, this module will load very early, earlier that other camera drivers, so the device path will be
/dev/video0
Reboot and verify that this command still works:
| \
🔗Automation
Manually running a script every time we join a video call is not fun. Luckily, we have two ways of solving this, pick one!
🔗Full
Let’s automate staring the capture using udev.
First, create a udev script
#!/bin/bash
# Uncomment the next line in you want the camera to focus before capturing
#gphoto2 --set-config autofocusdrive=1
| \
&
And now we can use gphoto2’s screet to generate udev rules for us:
# magic script script name
| \
The script will be called when you connect any camera, which is nice IMO.
🔗Semi-automation
Running the capture all the time consumes CPU, so maybe it’s not something you want. Worry not, we can still make a nice button to start capture in KDE.
Go to Start Capture action Stop Capture action. Killing Setting → Removable Storage → Device Actions. We’re going to add two new actions: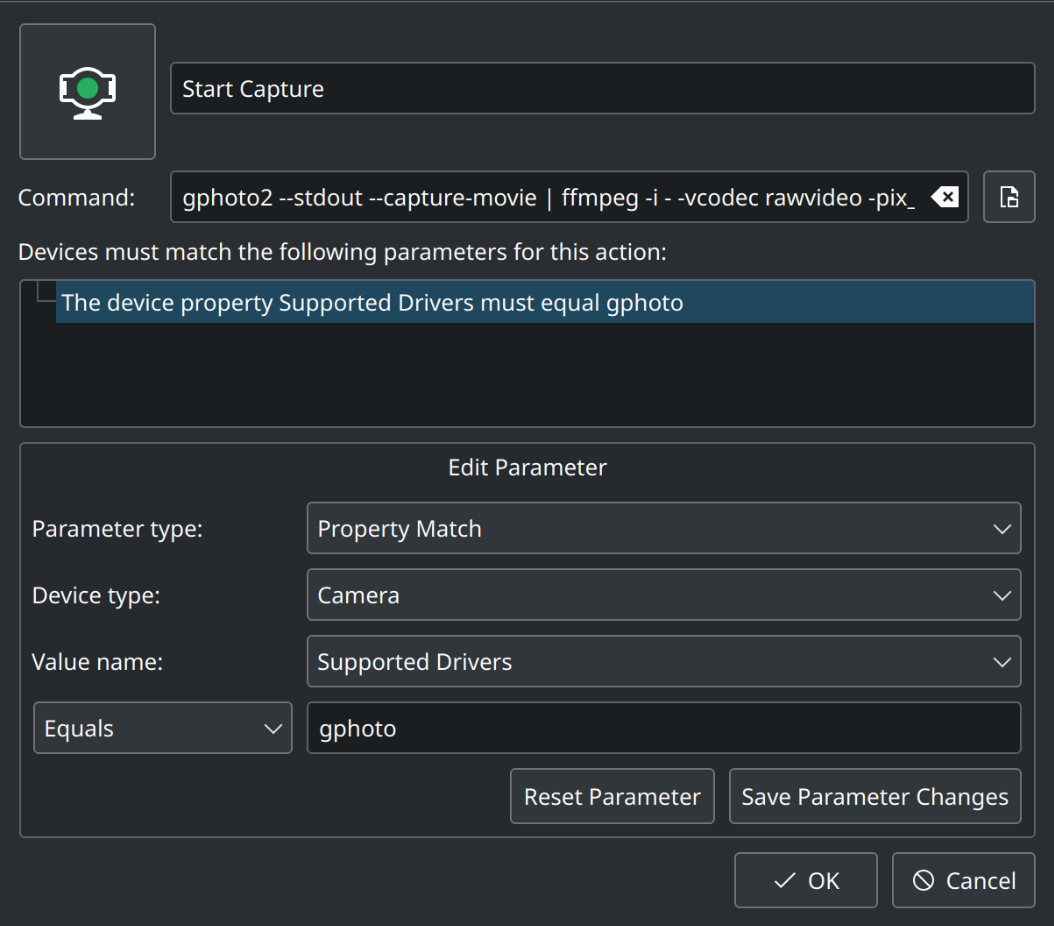
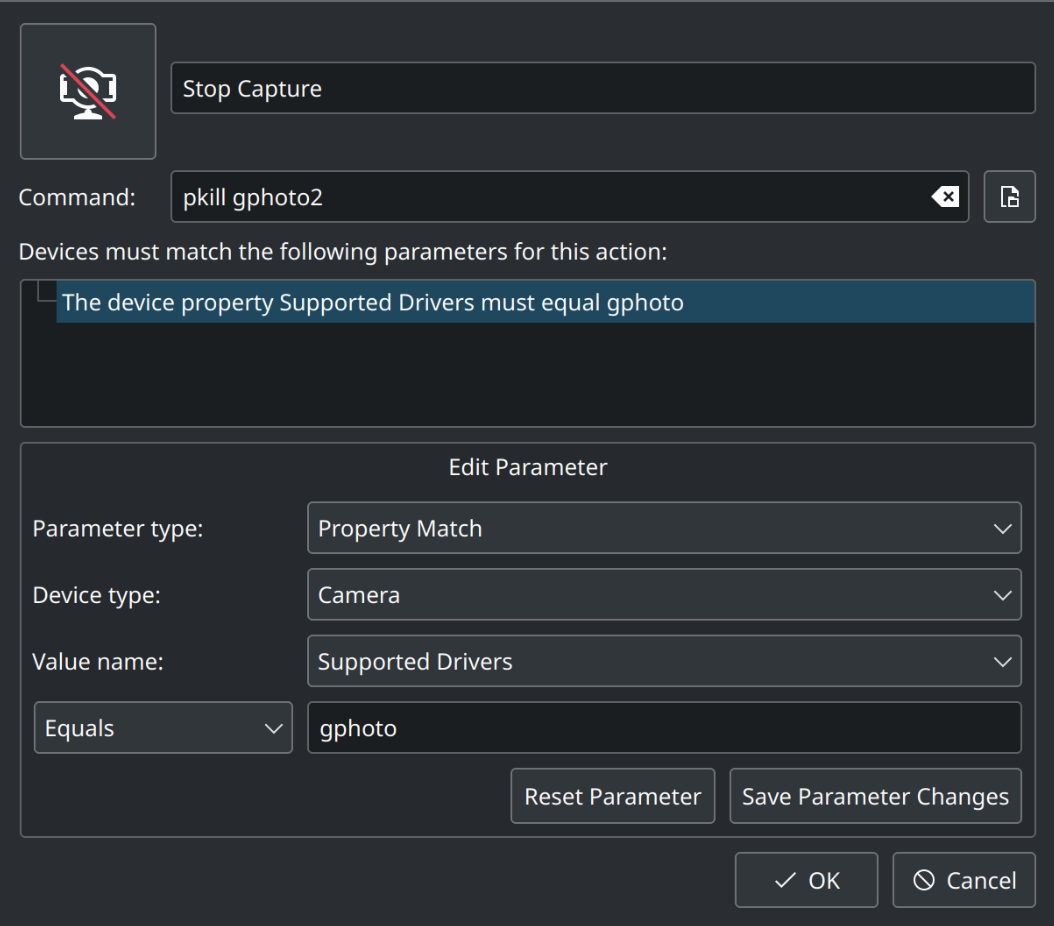
gphoto2 works just fine :)
After relogin and reconnecting the camera, you will see these two new action in the device menu: The created action in Device Menu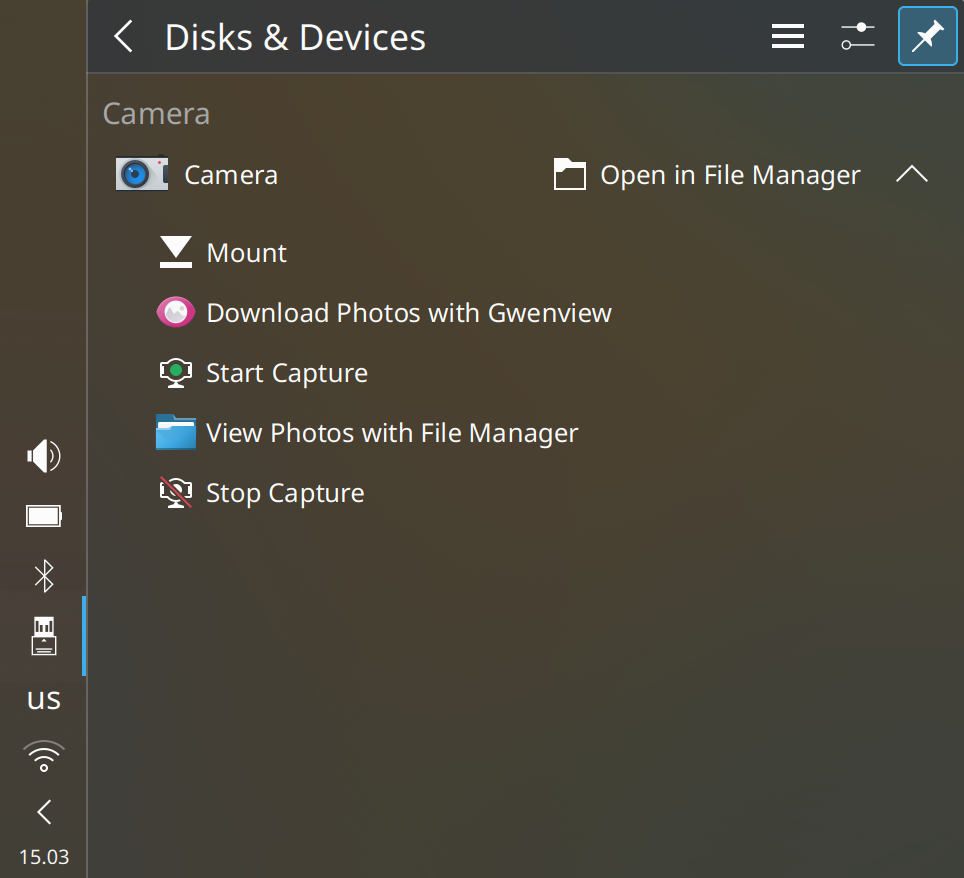
NB: If you choose this approach, remember to undo the “Full automation” step by either removing
/etc/udev/rules.d/90-libgphoto2.rulesor commenting out all the lines in/lib/udev/gphoto2-start-capture
🔗Mount
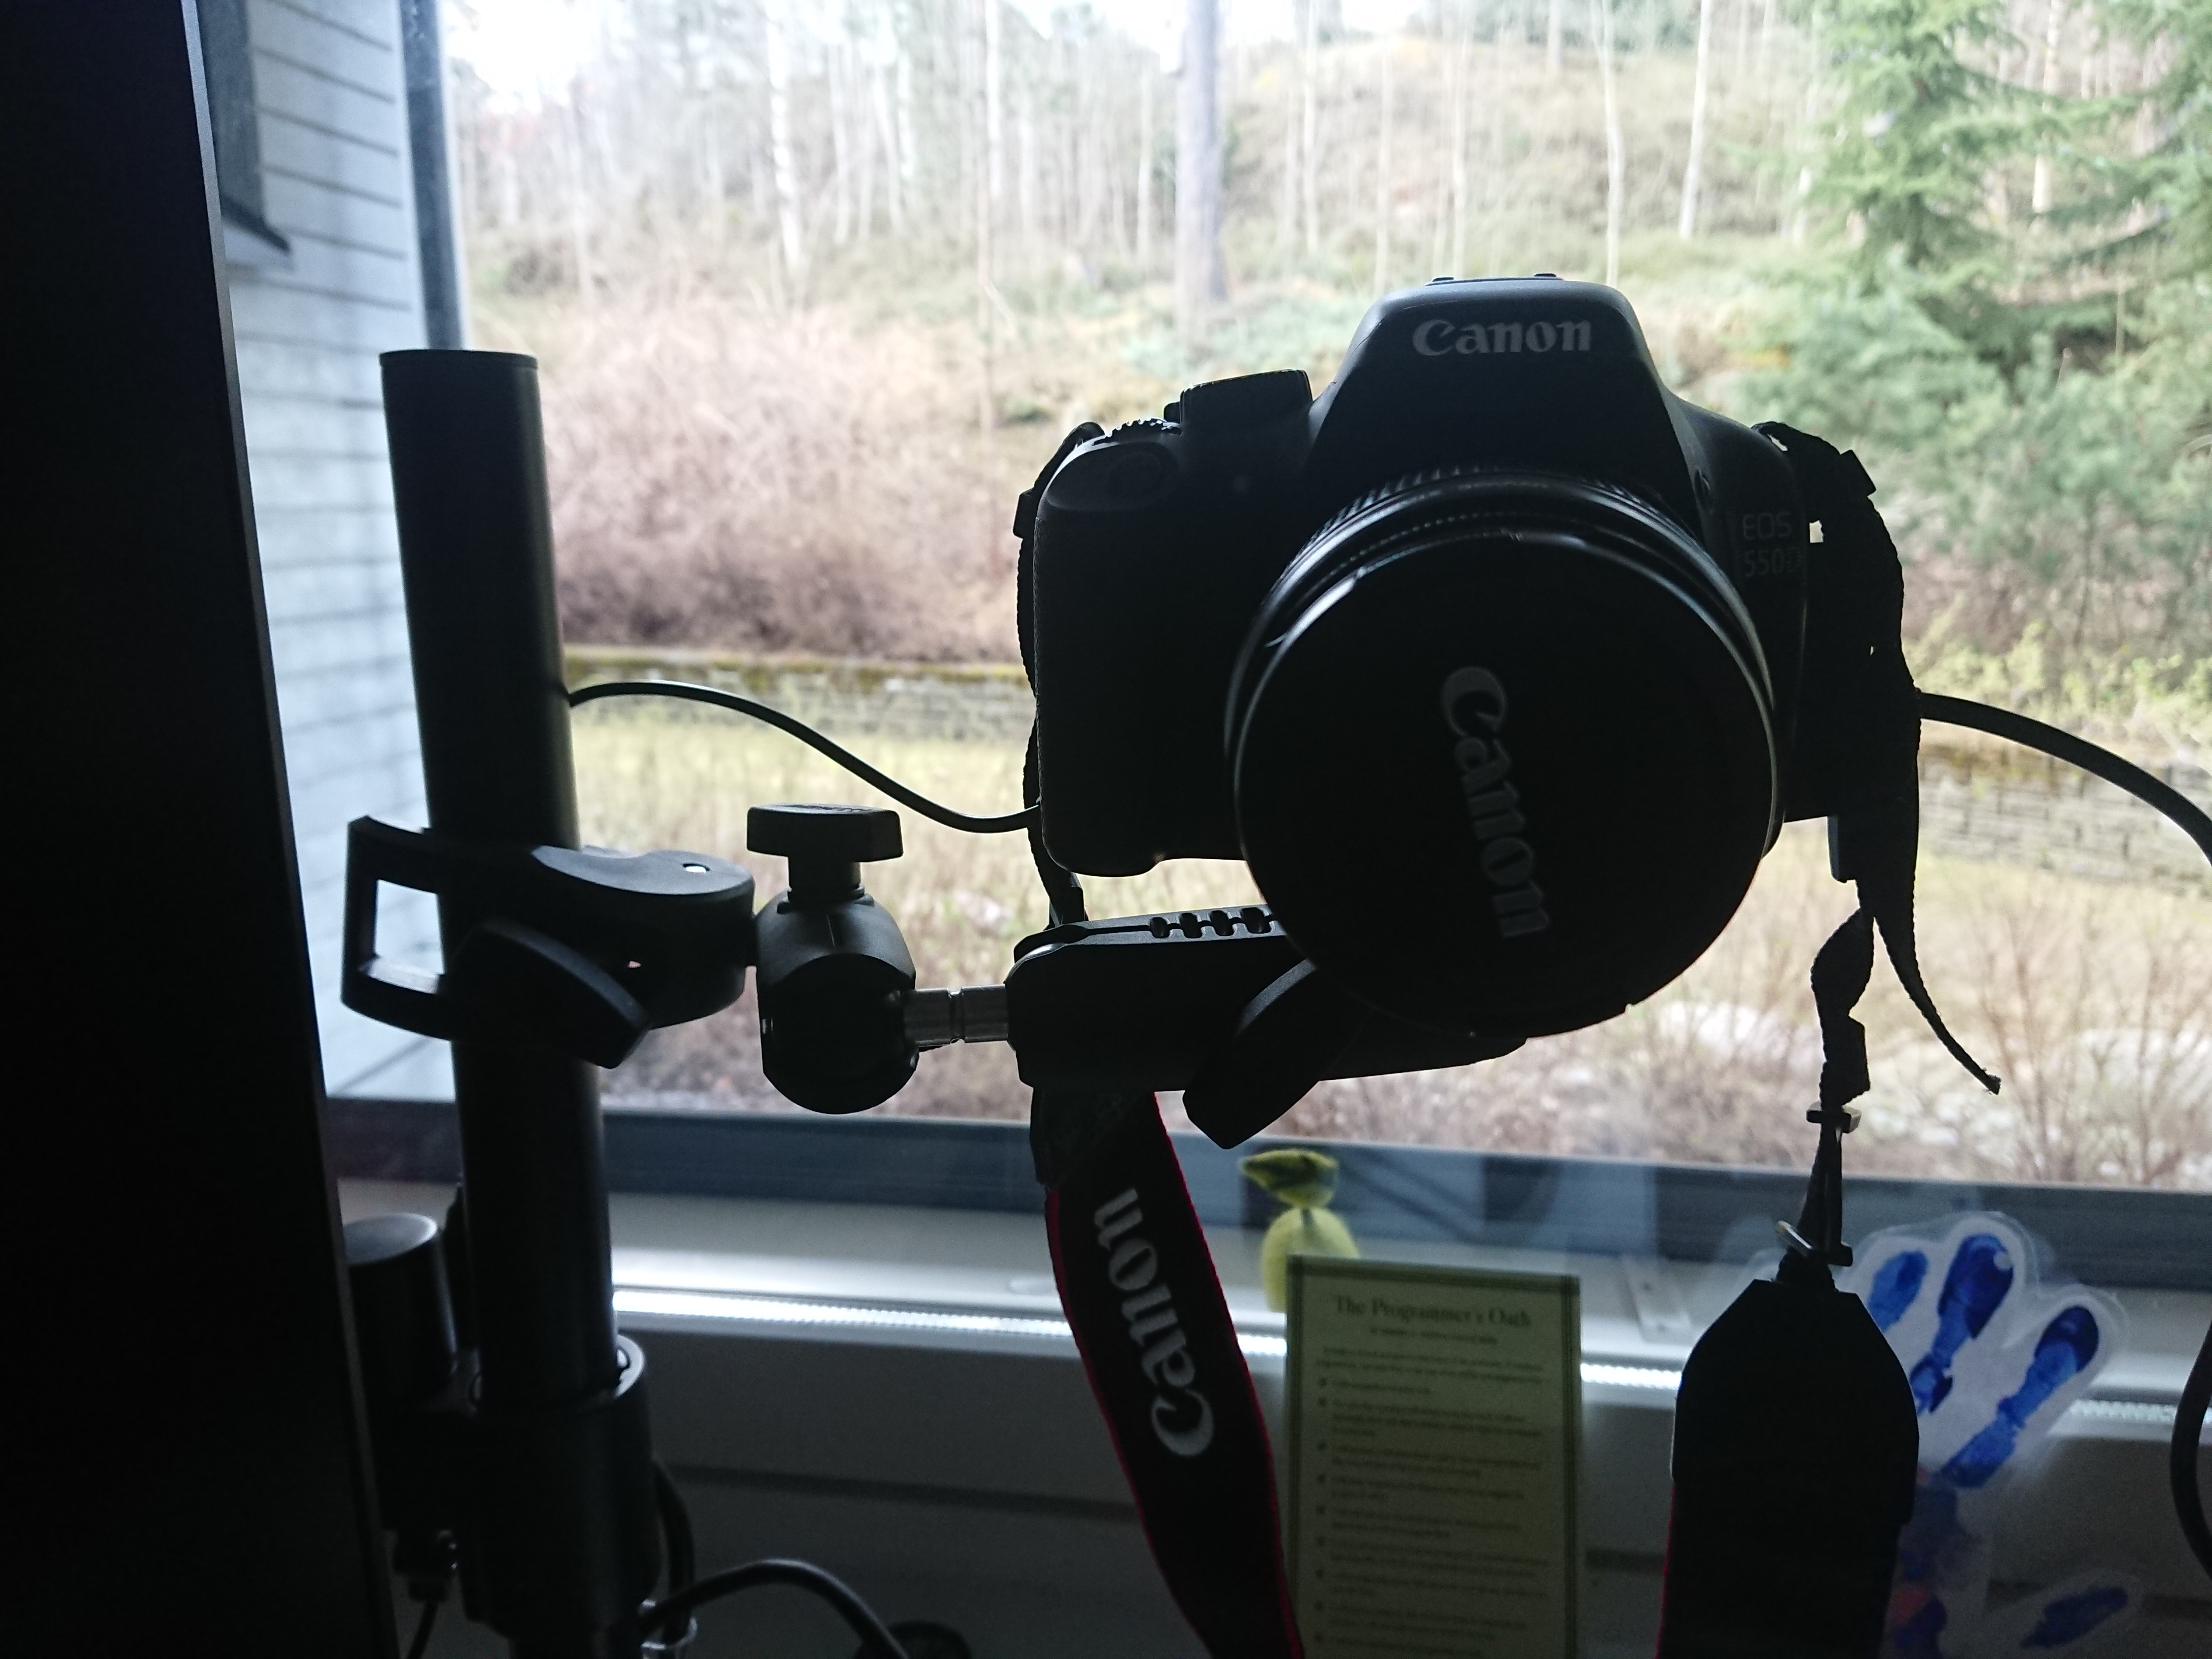
There is not much use for a camera that which lies on your table. We need a proper mount for it!
After some research, I found RAM Mounts. They are modular, so you can build anything you need for your desk setup. They also have two types of labels on each part: either “PATENTED” or “PATENT PENDING”. Probably this is the reason why they are so damn expensive.
Luckily, after some more research, I found Arkon Mounts, which don’t have these labels and are twice cheaper.
And now I have this amazing attachment to my monitor mount: My setup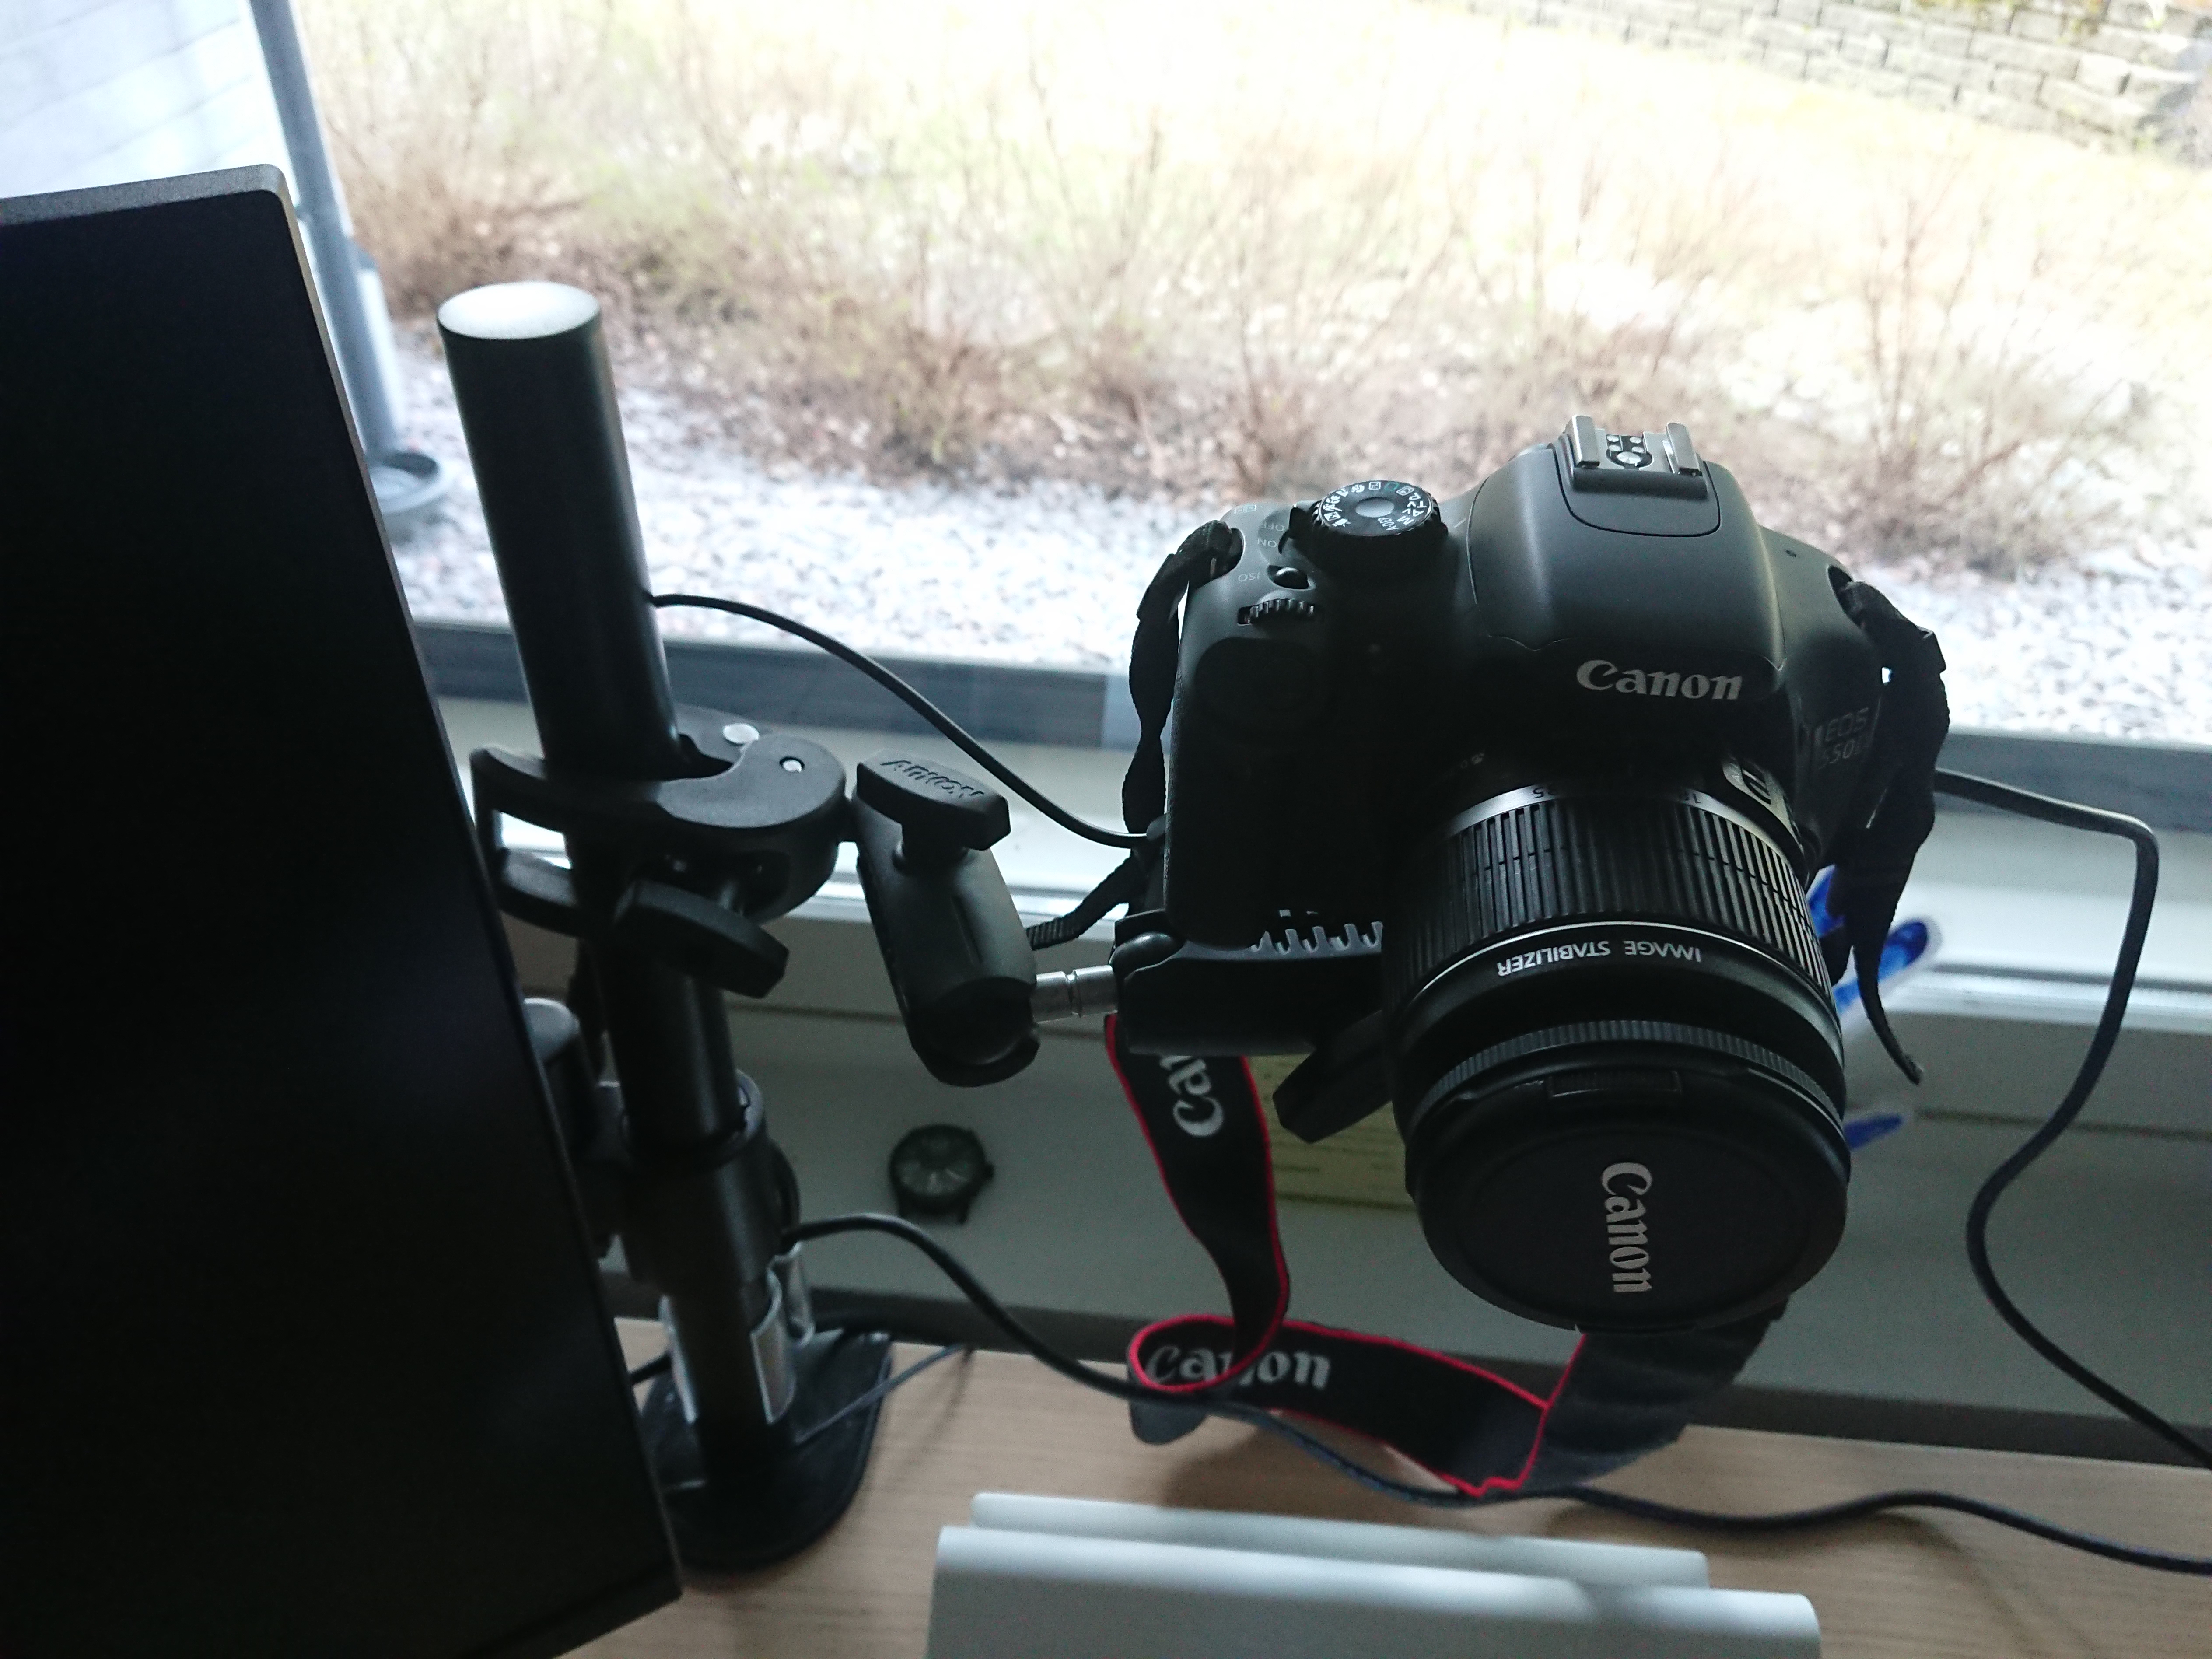
🔗Battery
If you’re following this guide, pretty soon you’ll find out that the camera’s battery dies very fast: in about two hours. Charging it after every video call is pretty cumbersome, and after a couple of months the capacity will be reduced significantly.
The last pice of the puzzle it a dummy battery (bought here):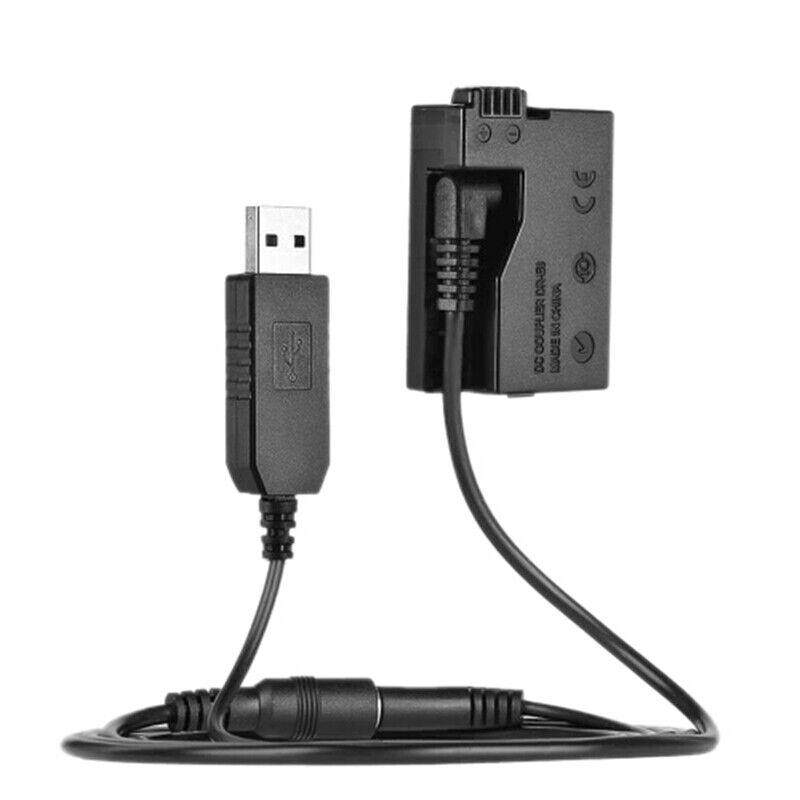
I think that the intendant purpose is to power you camera from a “Power Bank”, but we can just plug it into any USB port.
🔗Did it worth it?
Integrated camera VS DSLR camera during the day. Integrated camera VS DSLR camera during the night with low light.

The difference is mush more drastic.
Overall, I’m happy with the result. I hate buying new things when I already posses something that has the required capabilities.
I had to buy two new things though: a “dummy battery” and a mount, but both of them can be used for other purposes.